
In Photoshop, Curves are better than Levels for adjusting the brightness and contrast, and for performing color corrections on your images.
New lynda.com course Exploring Photoshop: Mastering Curves.
Here are five reasons, with specific examples, of why you want to use Curves instead of Levels:
1. Custom lightening-brighteningCurves provides 256 levels of tone and color controls on each color channel and Master channel, while Levels allows only three adjustments!
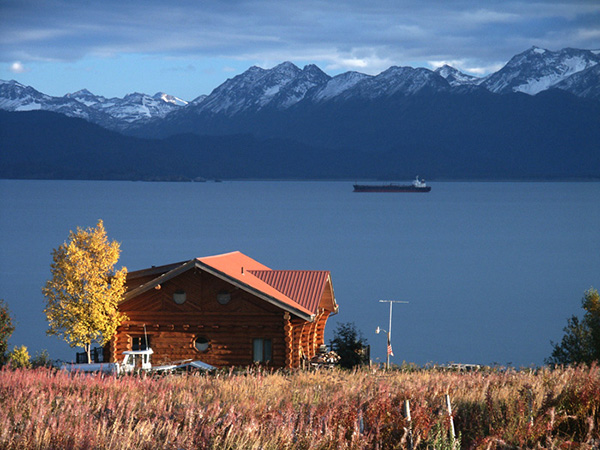
In this late afternoon image of Kachemak Bay, Alaska, that I shot from my porch, I can apply any of several Curve-based lightening adjustments (including (including customized brightness adjustments) that Levels does not provide.
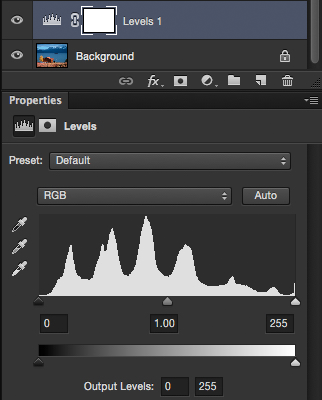 |
Starting Level panel
|
 |
| Level panel after midtone-only lightening-brightening adjustment |
Here I can lighten the image by adjusting the midtone slider, which lightens all the tonal values between the highlight and shadow points, while lightening the midtone the most.
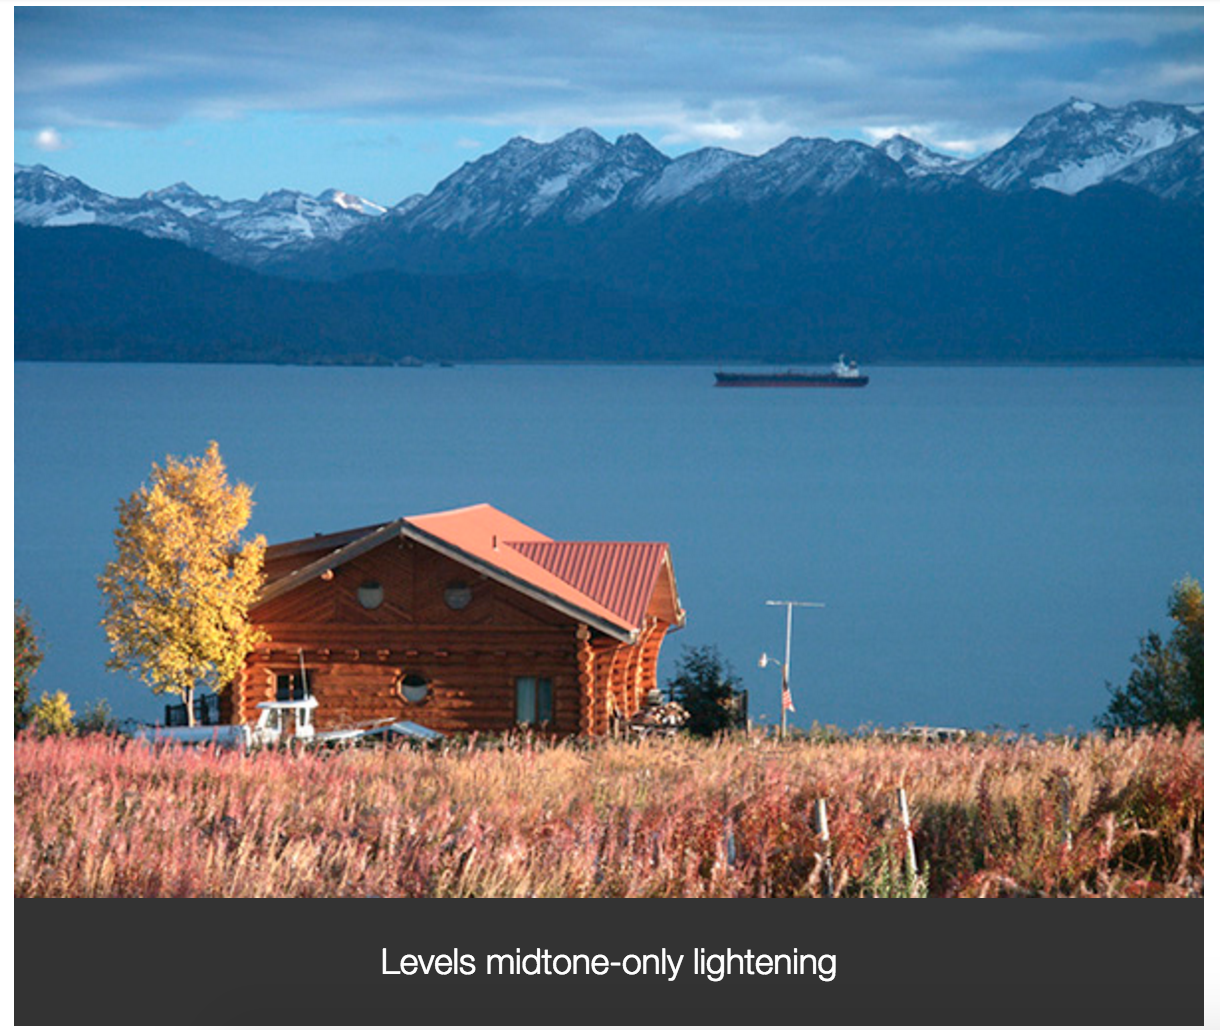
Note overall-general lightening in the image above, but no change in contrast or preferential lightening or darkening of particular tonal areas.

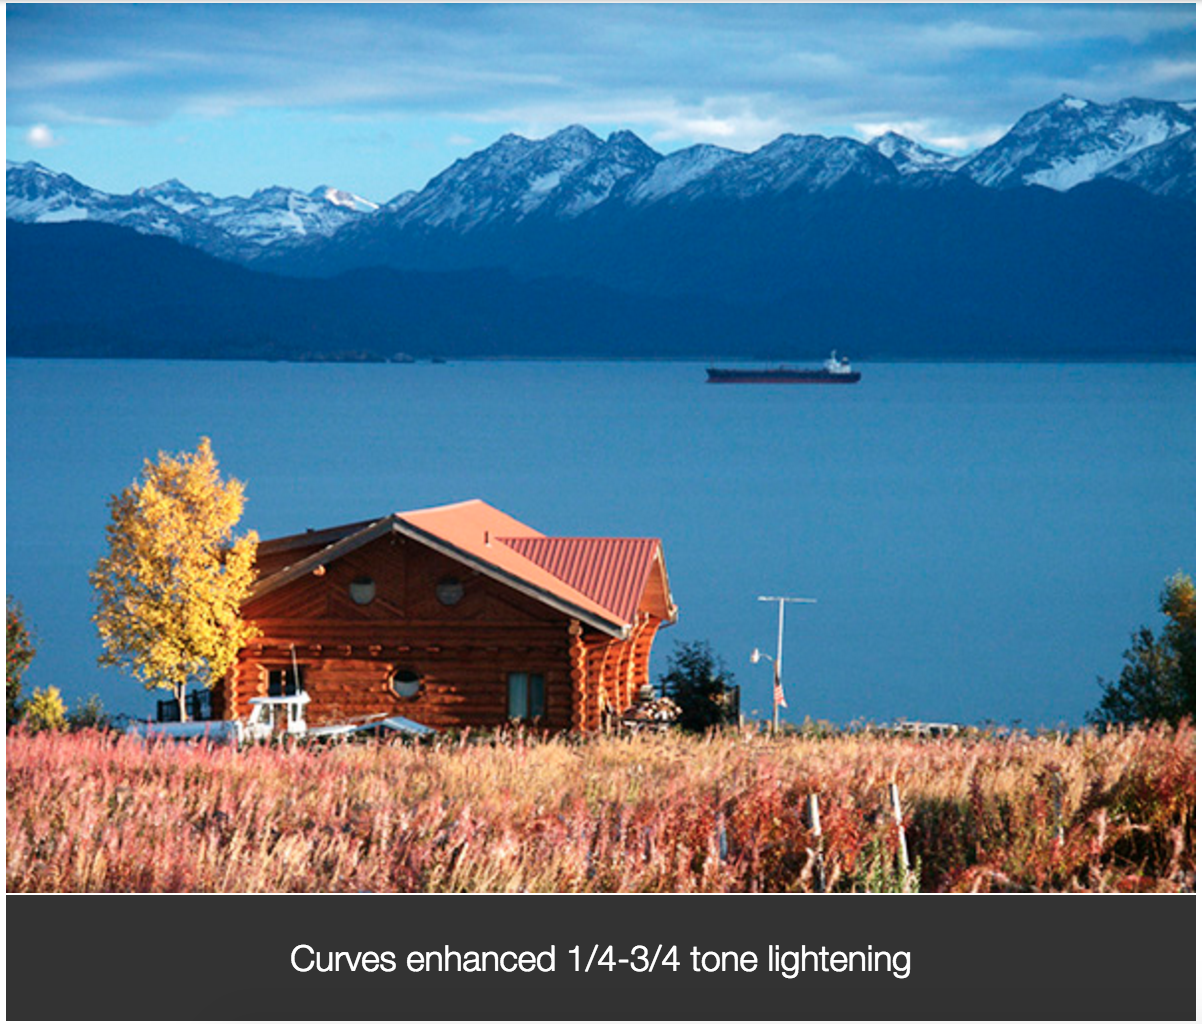
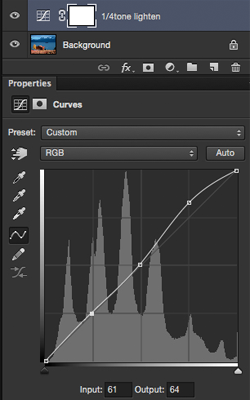
By contrast, the Curves dialog allows me to place control points anywhere along the Master (RGB) Curve. Here I’ve added three control points, ¼ tone, mid-tone and 3/4 tone points (in addition to the two starting highlight and shadow point) that I’ve used to lighten the ¼ tone more than the 3/4 tone, while leaving the highlight and shadow points unadjusted.
Notice the three interior control points along the Curve that have been moved, while the two end control points (the highlight and shadow points) have not been moved.
Level’s three adjustment point do not allow me to customize the brightness like this.
Alternately, I can choose to lighten the image only in the ¼ tone portion of the image, as I have done here by only moving the 1/4 tone control point up while placing stationary midtone and 3/4 tone control points.
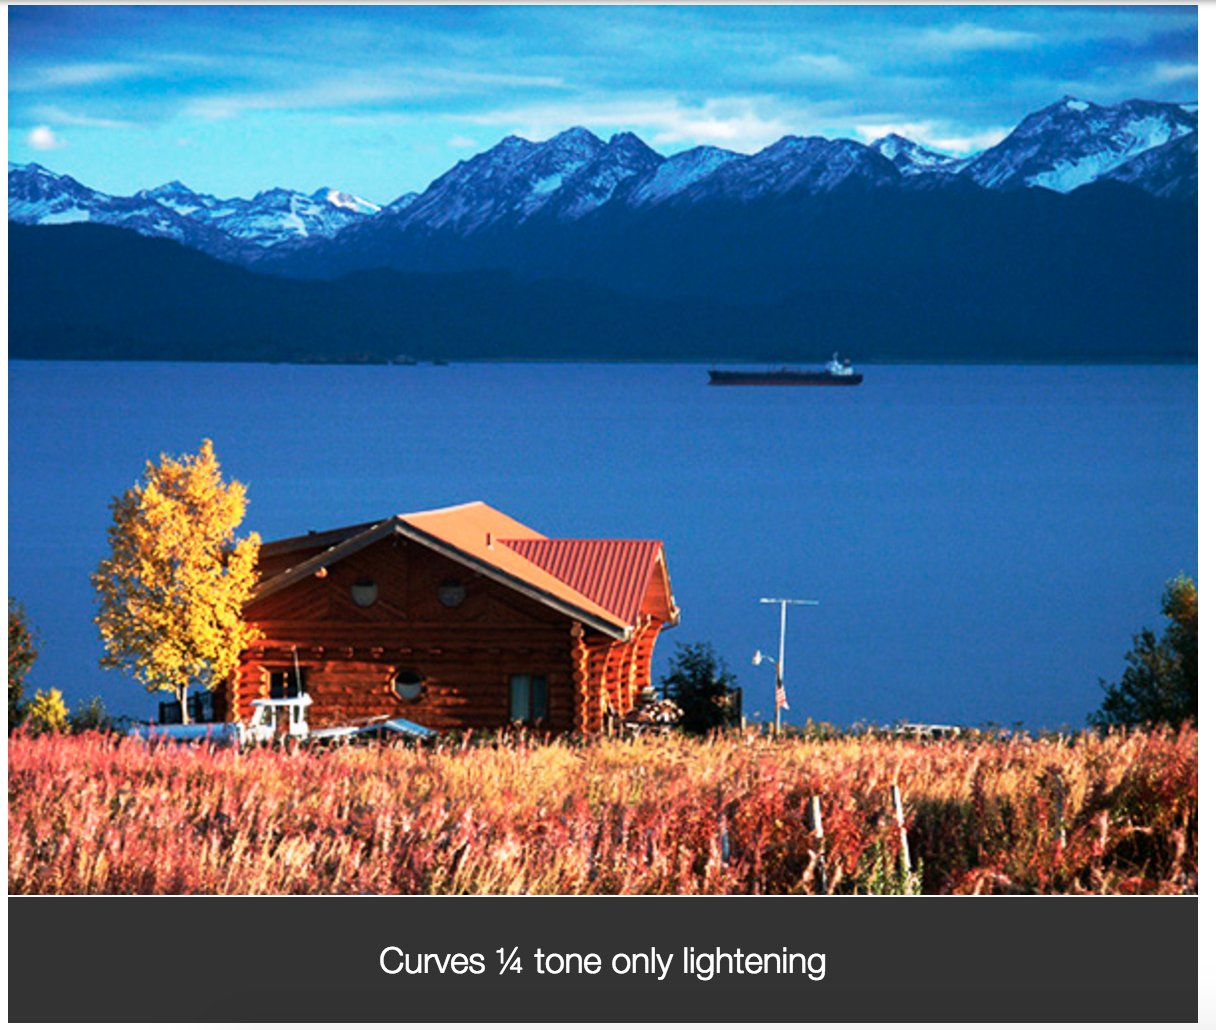
To learn more, watch the free videos Adjusting brightness and contrast and Making area-specific tonal adjustments from the new Mastering Curves course.
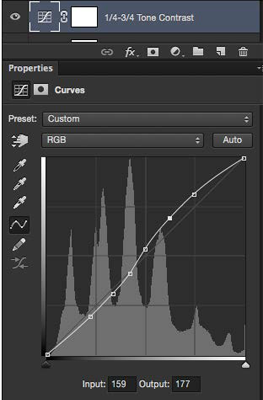
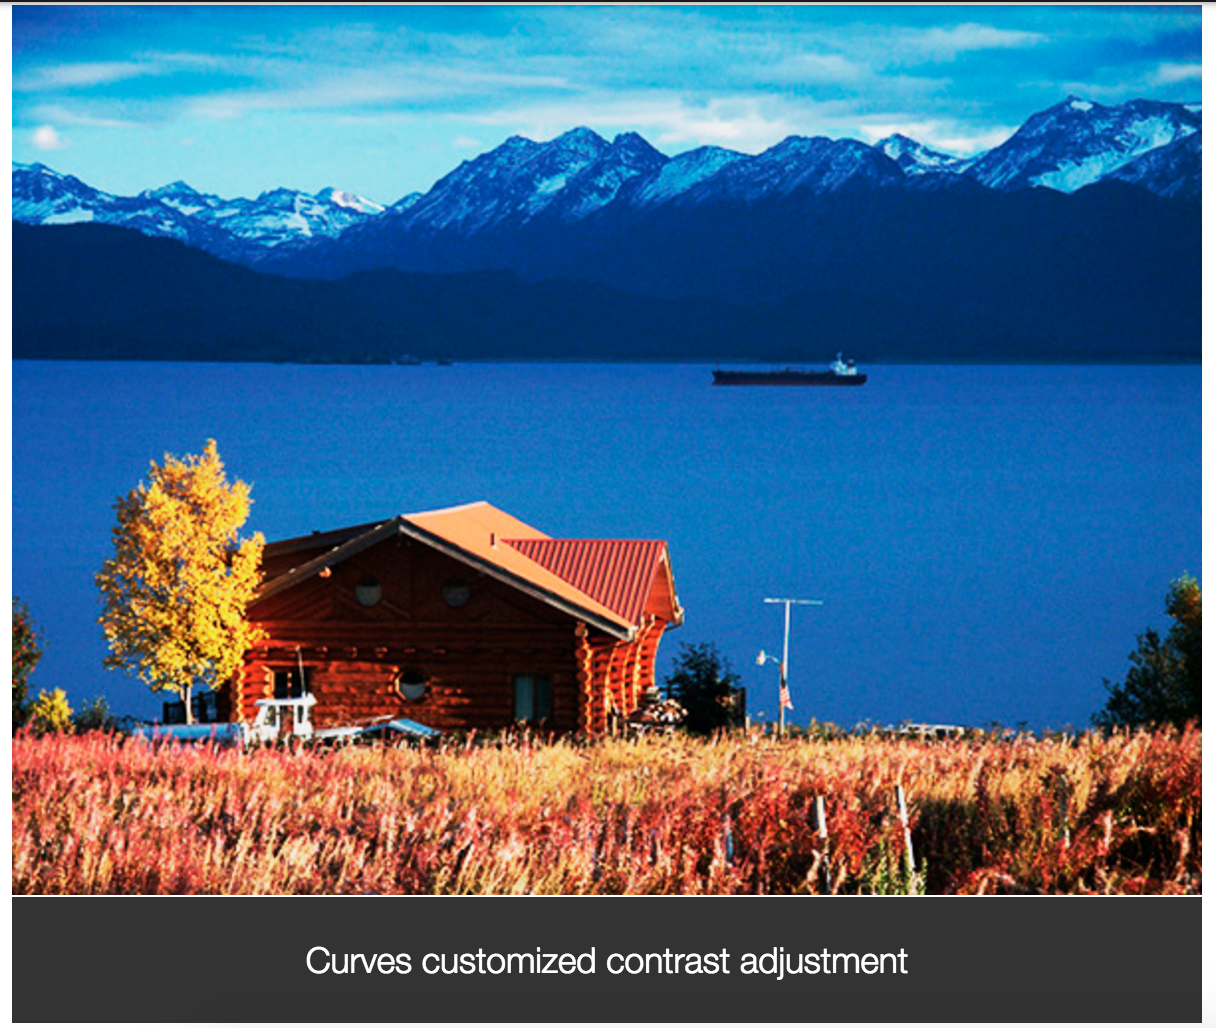
2. Custom contrast control
Curves provides more customized contrast control than Levels.
Levels provides enhancement of contrast only by setting highlight and shadow points. Curves allows you to adjust contrast by setting and positioning control points along the entire tonal range.
Example: Here I’ve placed eight control points along the master Curve, each of which I can adjust independently of the others. Notice that I have lightened the 1/4 tone a greater amount than I have darkened the 3/4 tone.
As a result, I am able to preferentially lighten the sky and foreground to achieve a customized contrast adjustment. Again, this type of customization of tone distribution is just not possible with Levels!
3. Quantitative control
Curves allows quantitative control of all tonal and color values, including critical highlight and shadow points, through the use of control points.
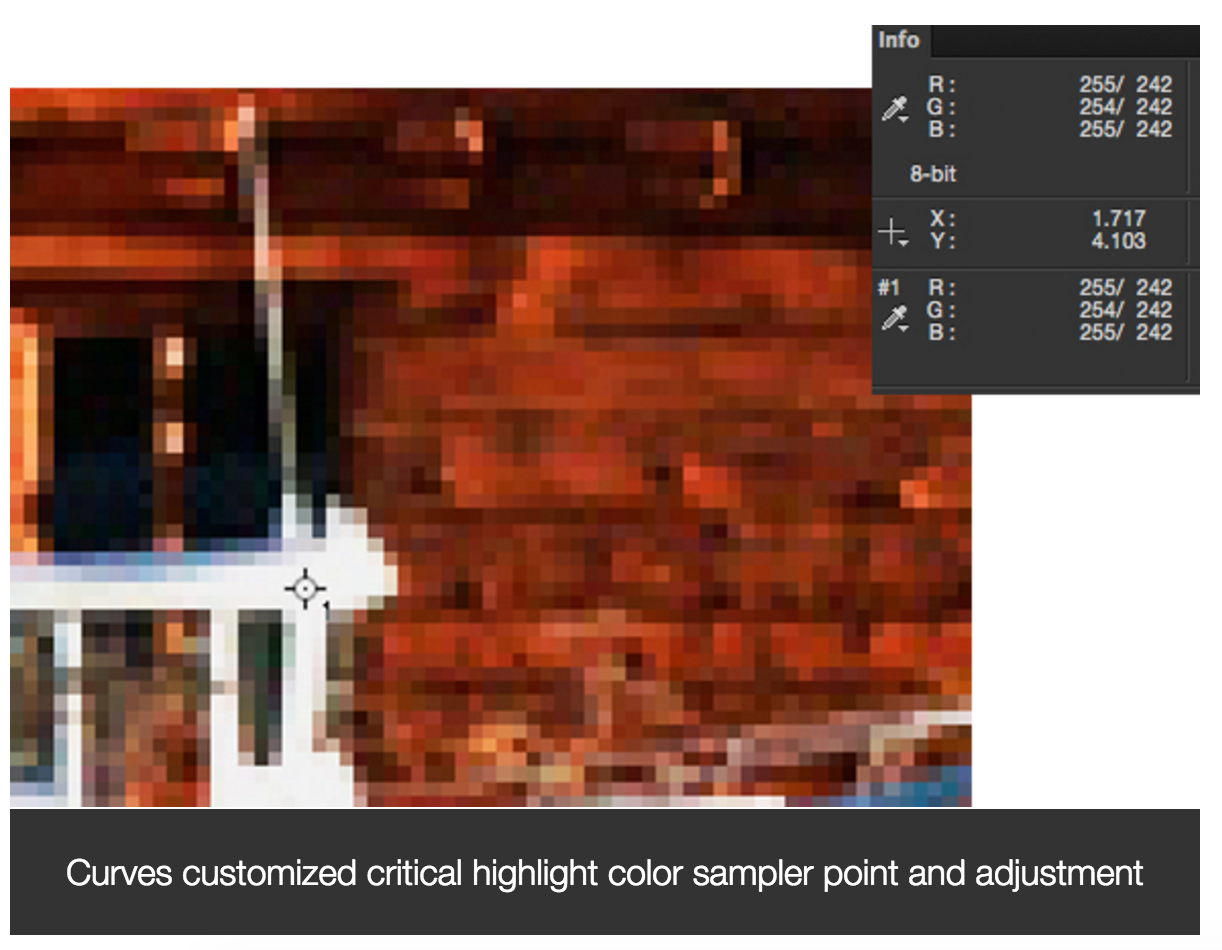
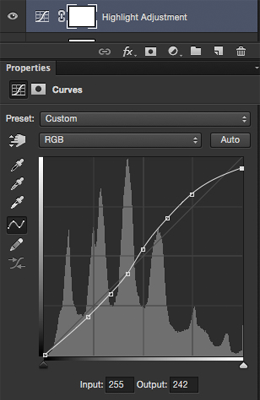
Example: This is an example of some of the subtle, and often very important, control you can easily achieve with Curves. Here I’ve placed a color sampler point on the image on an initially blown-out critical diffuse highlight area of the image (note the 255 values in the Info Panel) and darkened this critical highlight area by moving the highlight control point down in Curves.
Note how the highlight control point (solid) has been moved straight down from its initial-starting position and the final 242 values in the Info Panel, without affecting many of the other tonal values in the image.
Levels does not provide for this type of subtle, critical targeted adjustment.
Learn more: Watch the free video Setting highlights and shadows.
4. Accurate color corrections
For applying color corrections to image, Curves is the undisputed king! Using Color Sampler and Curve Control points, I can achieve exactly the results I want.
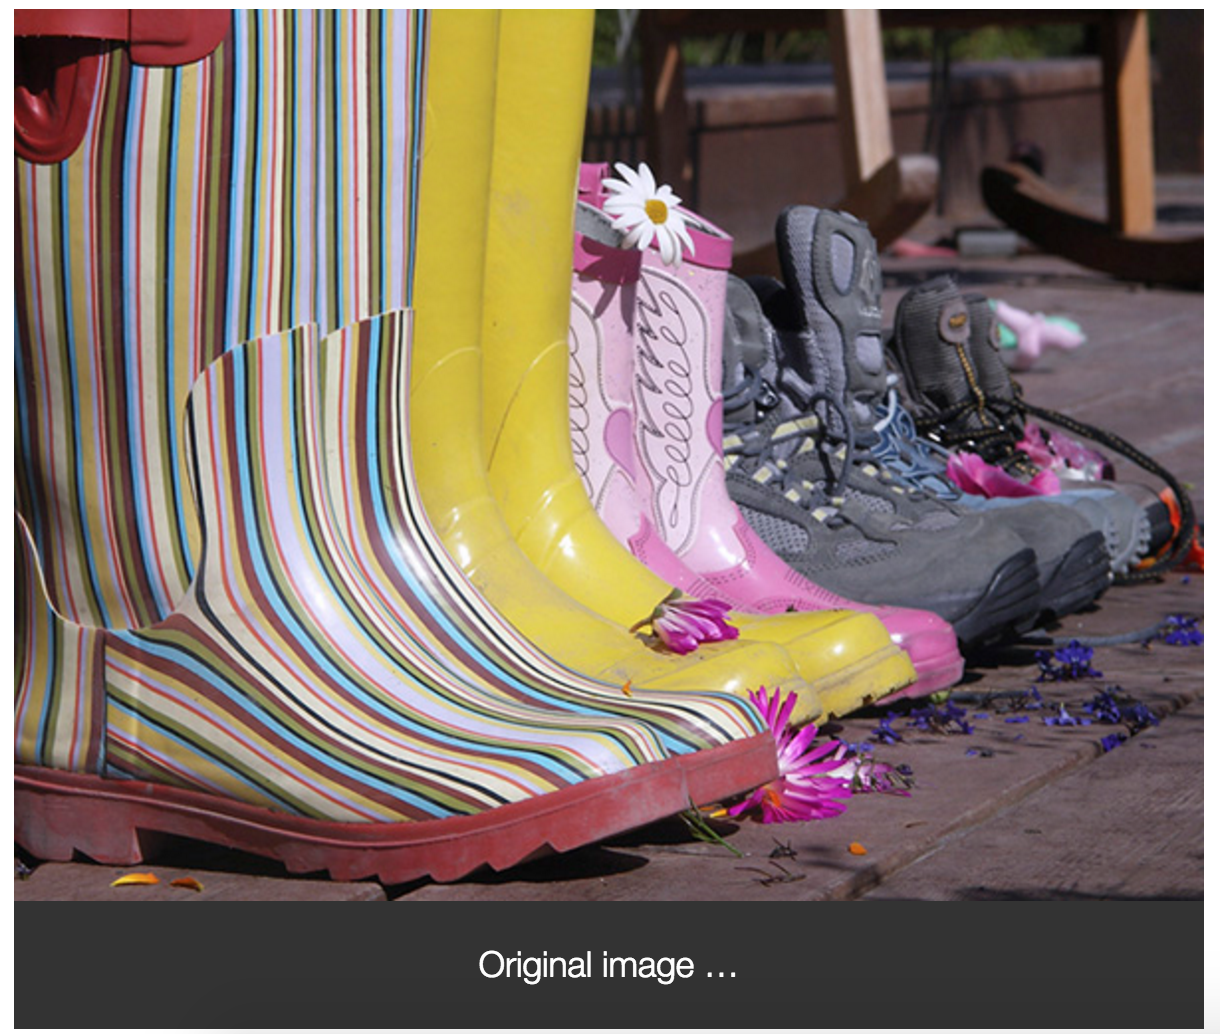
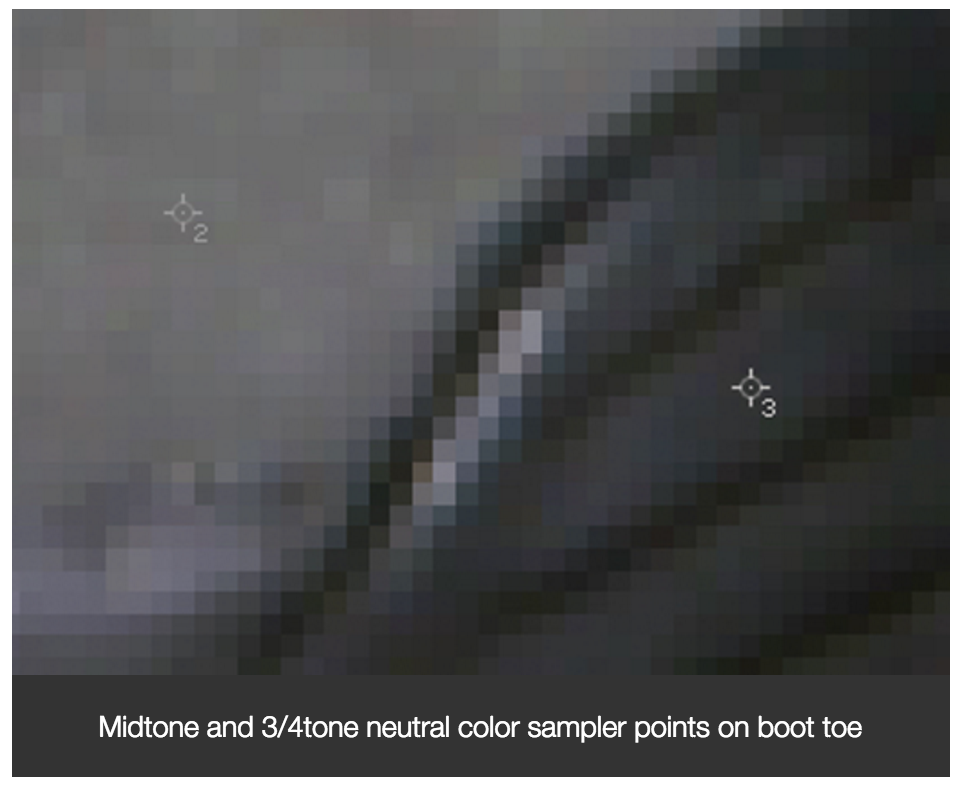
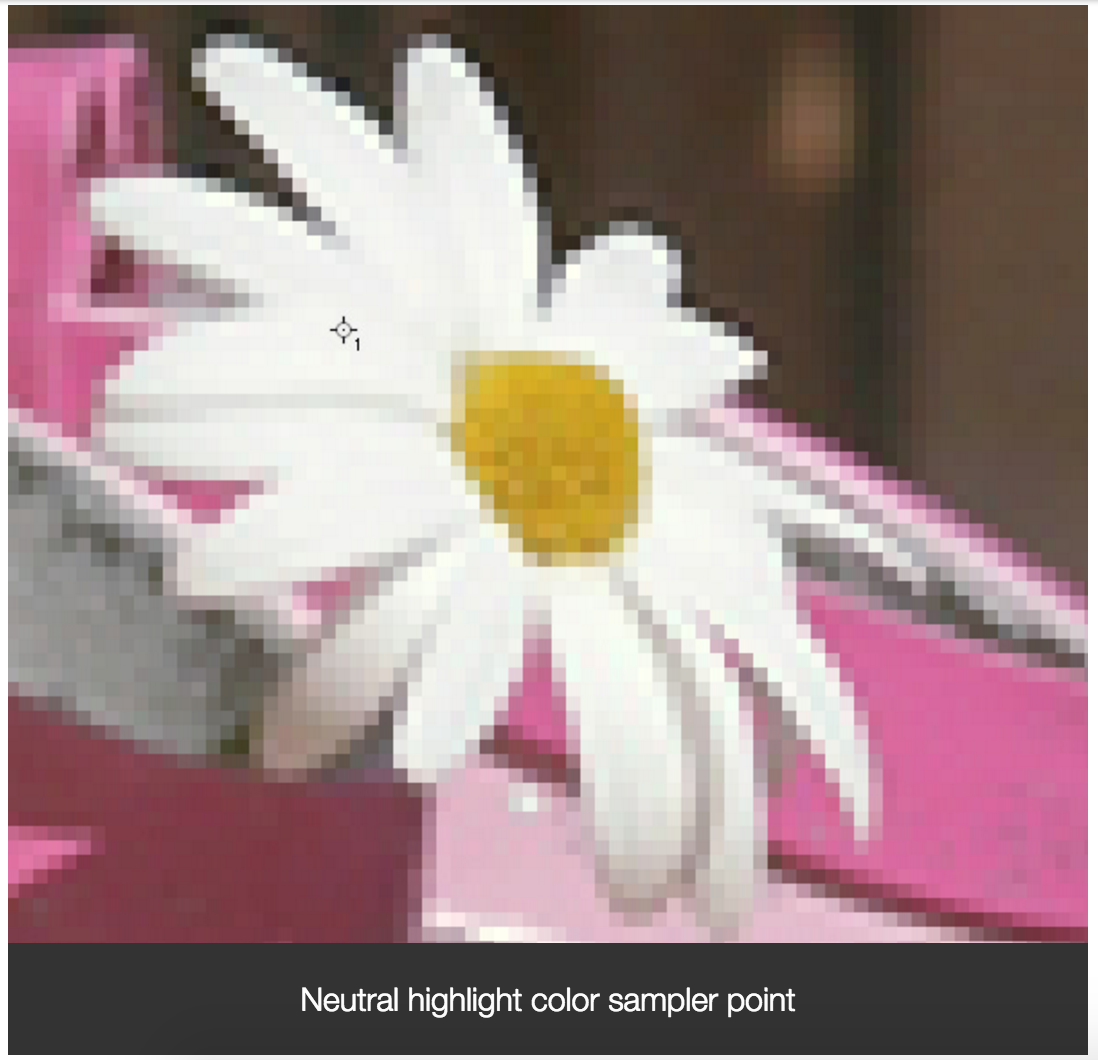
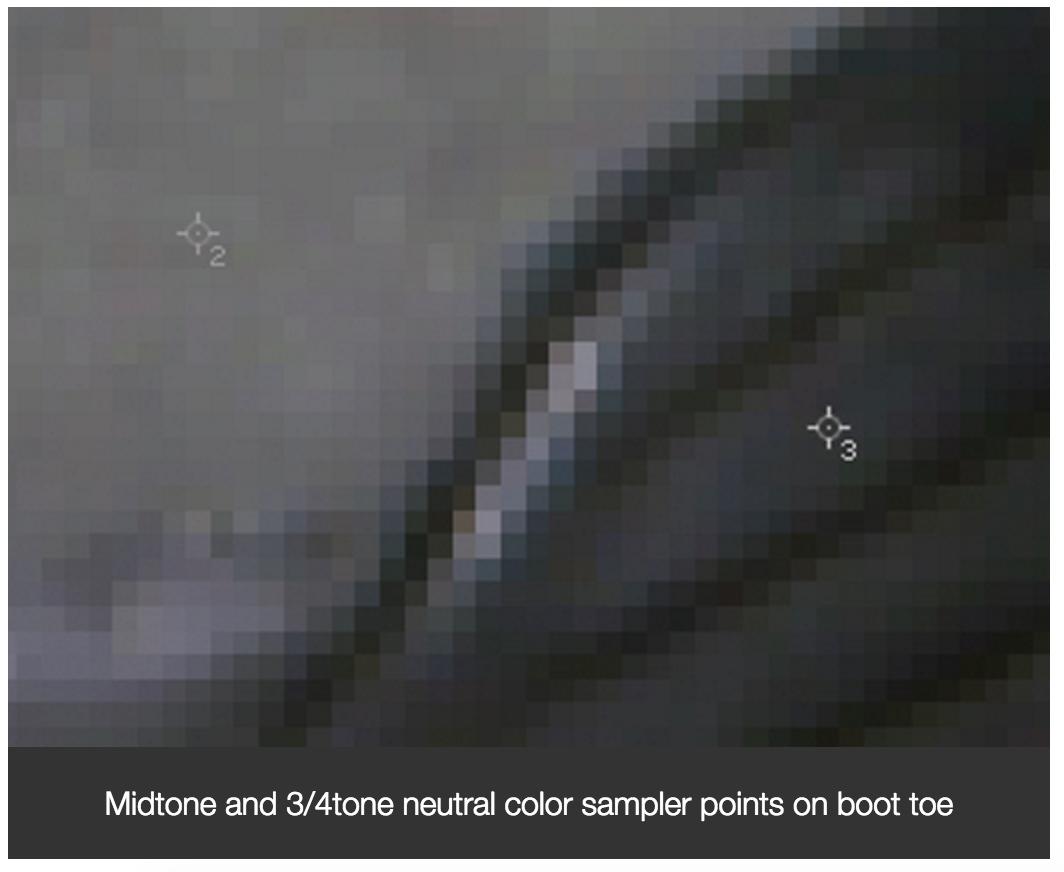
In this example, I’ve placed color sampler points on three critical neutral areas in this image, and have created corresponding Curve control points on the individual Color Channel curves.
By adjusting the control points on the individual color curves, I have neutralized the critical gray areas and corrected the color based upon the values of those critical neutral areas.
Curves allows me to control specific key areas of an image, which Levels does not, to achieve the exact numeric-based area-specific color adjustment that I want.
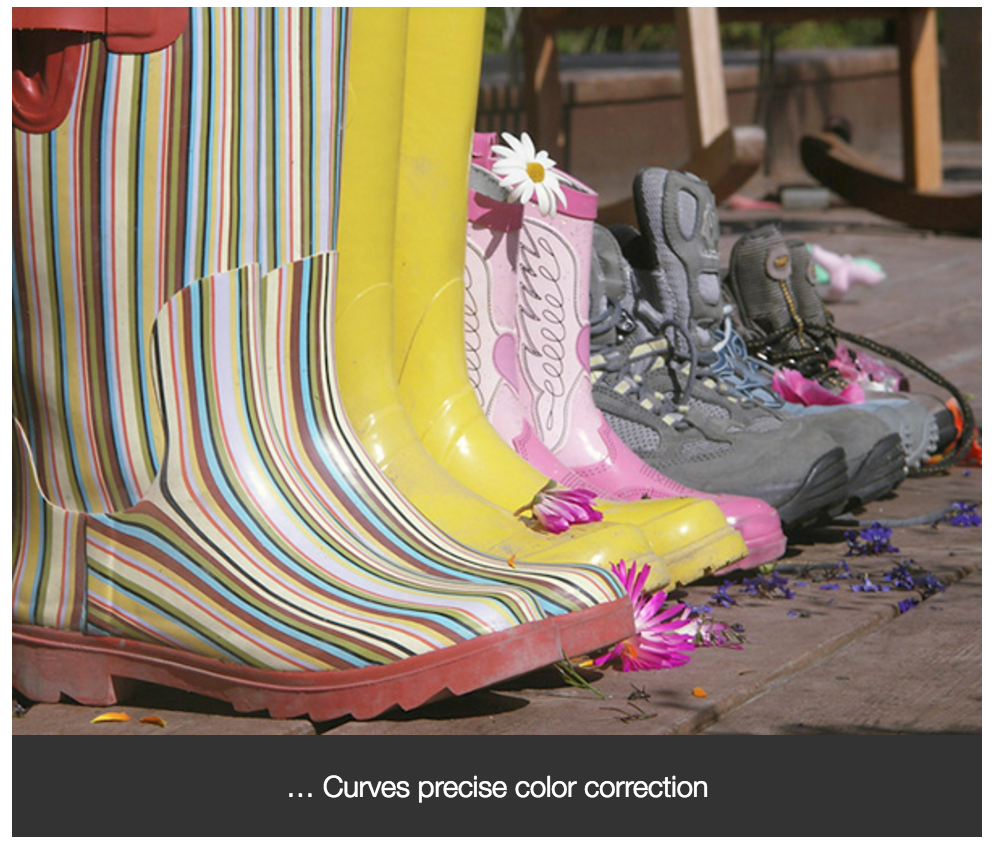
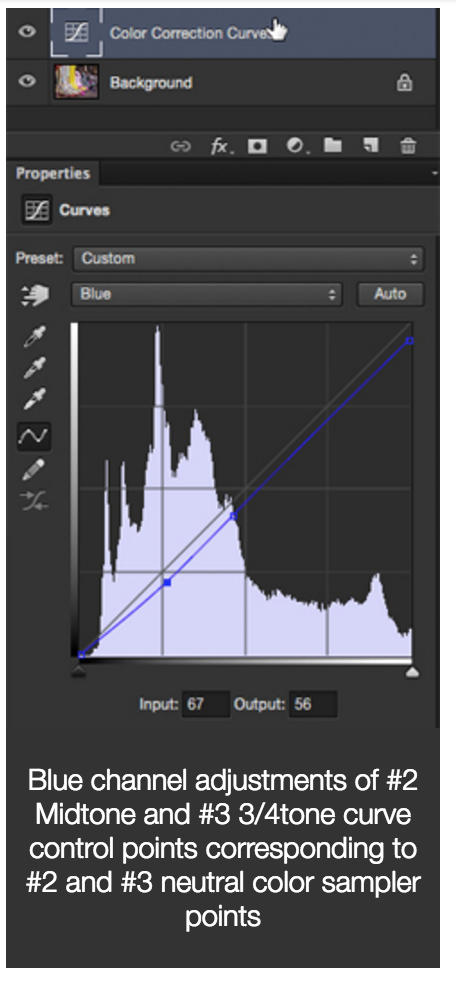
Blue channel adjustments of #2 Midtone and #3 3/4tone curve control points corresponding to #2 and #3 neutral color sampler points
Note better neutrals and more saturated colors in the color-corrected image above.
See how I made these color-correction adjustments in the Numeric Color Adjustments with Curves chapter of Mastering Curves.
For step-by-step instructions on how to complete a variety of curves-based color correction projects, watch my course Photoshop Color Correction: Advanced.
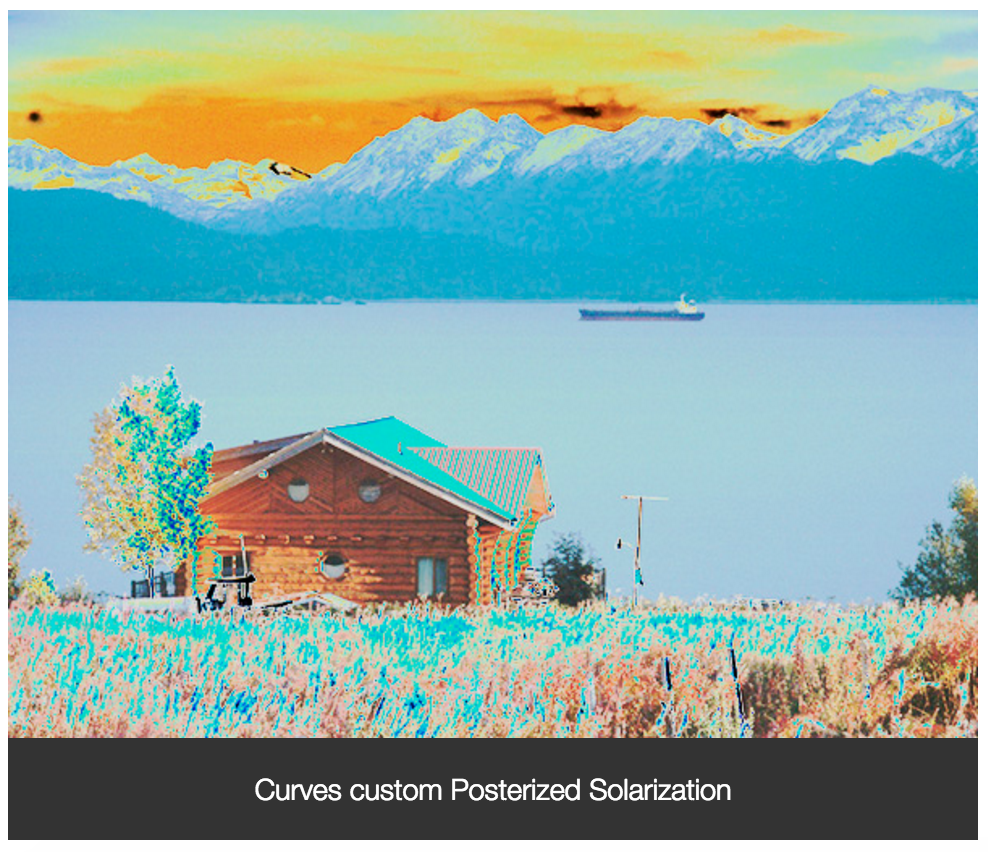
5. Creative control
With Curves, you can apply dramatic creative changes in tonal/color distribution totally unavailable in Levels.
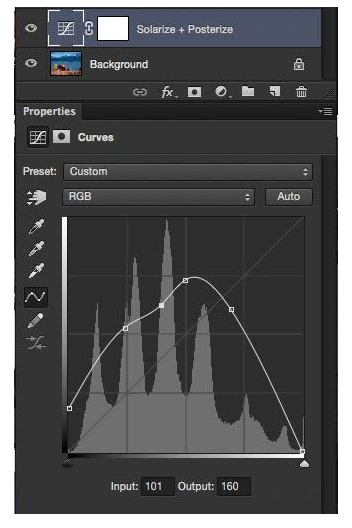
In this example, I Solarize the image and control the precise look and feel of the solarization by adjusting multiple control points along the Master Curve. Here I also add a bit of Posterization of the 3/4tonal area creating a combination Partial Posterized Solarization.
Although I do not perform this here, you can even create separate solarization Curves for each color.
Using Curves to control solarization and other effects gives you more control than most dedicated effects tools!
See how I made these color-correction adjustments in the Numeric Color Adjustments with Curves chapter of Mastering Curves.
For step-by-step instructions on how to complete a variety of curves-based color correction projects, watch my course Photoshop Color Correction: Advanced.
5. Creative control
With Curves, you can apply dramatic creative changes in tonal/color distribution totally unavailable in Levels.
In this example, I Solarize the image and control the precise look and feel of the solarization by adjusting multiple control points along the Master Curve. Here I also add a bit of Posterization of the 3/4tonal area creating a combination Partial Posterized Solarization.
Although I do not perform this here, you can even create separate solarization Curves for each color.
Using Curves to control solarization and other effects gives you more control than most dedicated effects tools!
Simply stated, Curves is Levels on steroids—and then some! Take the time to learn and use curves. You’ll be glad you did.
Check out these popular Photography courses
 Photoshop CC Essential Training (2013)
 Foundations of Photography: Exposure
 Photoshop CC Essential Training (2015)

No comments:
Post a Comment
Thanks.