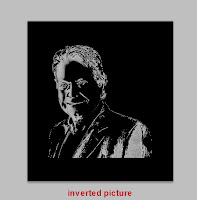
How to choose a photo and design a text photo ?
Please read more here and watch the video

How to chose the photo?
The selection of the photo you might use is critical .It should be straight forward head shot (as much as possible ) with not too much contrast and not too much colors and plane background .
The diagrams

Thanks
I hope it was useful .Hussin Fahmi
Please read more here and watch the video

 |
| Hussien Fahmi |
How to chose the photo?
The selection of the photo you might use is critical .It should be straight forward head shot (as much as possible ) with not too much contrast and not too much colors and plane background .
- Select all the shadows in the image by Select menu - Color Range - shadows OK .
- Copy the selection to new layer by pressing Ctrl + C to copy ,then Ctrl +J to paste in new layer, you will see the new layer with the shadows copied to it .Rename the layer to ,shadows .Select the shadows layer, and fill it with black color, from Edit menu - Fill, then from the drop down menu of use select Black , and check preserve transparency .
- Select the background layer , Select menu - Color Range -Midtones OK.
- Copy the selection to new layer by pressing Ctrl + C to copy ,then Ctrl +J to paste in new layer, you will see the new layer with the shadows copied to it Rename the layer to ,midtones .Select the midtones layer, and fill it with 50%gray go to Edit Menu - Fill menu then from the drop down menu of use select 50% gray , and check preserve transparency .
- Merge the two layers (Select the two layers with the shift key and then press Ctrl +E ).
- Open new Photoshop document , and get text from anywhere like word and copy it then click the Type button in Photoshop and draw with the mouth rectangle and paste the text to it ( in the new document).The size of the text should be smaller than the image .
- Go to Edit menu -Define Brush Preset -rename it with text -OK,then close the new document .
- Create two new layers then select the lower new layer and fill it with white (put the background layer to white ,then press Ctrl + Backspace) , then hide this layer just click the eye icon in the layer panel .
- Select the upper new layer ,then select Brush or press B key ,then select the text brush you saved before then select the foreground color to be your text color adjust the brush size ,and click on the image on the new layer to put your text . Reduce the opacity to90%from the toolbar option panel up. Use the Transformer to adjust the size and direction you like .Hide this layer turn off its visibility ( from the eye icon) .
- Select the merged layer ,Ctrl A to select all the layer , then Ctrl C to copy it
- Turn the visibility of the text layer on from the eye icon , and background and layer 1 off .
- Select the text layer and add a vector mask from the button at the bottom of the layer panel, then press the frame of the mask in the layer panel +Alt key ,then paste the pixels you copied before ( Ctrl +V).
- Ctrl +D to deselect , then Ctrl +I to invert the image , we have now a negative image .
- Select the text layer then add Gradient Overlay from the add layer style from the button at the bottom of the layers panel(fx) ,select the gradient you like from the menu , and put the Blending Mode to Screen .
- Select the text frame in the layers panel
- Select Brush Tool ,soft brush decrease the opacity to 50% put the foreground color to black , then paint over the text layer (click the text frame )

Thanks
I hope it was useful .Hussin Fahmi


No comments:
Post a Comment
Thanks.